Why You'll Love It
- - No ice cream maker needed, just a couple of bags
- - Ready in five minutes, perfect for spontaneous cravings
- - Customizable flavors—add fruit, chocolate, or spice
- - Fun, hands‑on activity for kids and adults alike
*"The bag method is a lifesaver—my kids love it and I love the minimal cleanup!"*
Essential Ingredient Guide
- Heavy Cream: Provides richness and a smooth mouthfeel; choose a fresh, cold carton.
- Whole Milk: Balances the cream’s richness; a cold milk helps the mixture freeze faster.
- Granulated Sugar: Sweetens gently; dissolve it in the milk‑cream mix before bagging.
- Vanilla Extract: Adds warm aroma; a teaspoon is enough to flavor the whole batch.
- Ice: Large cube ice creates the cold environment; the more ice, the quicker the freeze.
- Coarse Salt: Lowers the freezing point of the ice, helping the cream chill faster.
Complete Cooking Process
-
Ingredient Readiness:
Measure and combine cream, milk, sugar, and vanilla in a quart‑size zip bag; seal tightly.
-
Flavor Development:
Place the sealed bag into a larger gallon‑size bag filled with ice and a handful of salt; shake vigorously.
-
Texture Control:
Continue shaking for about five minutes until the mixture feels firm yet creamy.
-
Finishing Touches:
Remove the inner bag, wipe off salt, and scoop into bowls or cones.
-
Serving Timing:
Serve immediately for a soft‑serve feel, or freeze an extra few minutes for a firmer scoop.
- Wrap the inner bag with a kitchen towel for a better grip while shaking.
- Use very cold cream and milk for faster set‑up.
- Add a pinch of cinnamon or cocoa powder before sealing for instant flavor twists.
Pro Tips
Well, after you’ve mastered the basic method, you’ll find yourself experimenting with all sorts of add‑ins—crushed cookies, fresh berries, or a drizzle of caramel. It’s a small ritual that brings a sense of calm, especially when you hear the gentle slap of the bag against the ice. I love how the simple act of shaking can turn ordinary ingredients into a sweet memory.
The essence of the dish:
A fun fact or historical angle:
Flavor or sensory focus:
You Must Know
- Use a gallon‑size bag for enough ice space
- Shake energetically but keep hands dry
- Taste after five minutes; adjust texture if needed
Frequently Asked Questions
→ Can I use low‑fat milk?
Yes, but the texture will be less rich; you may need a little more cream to compensate.
→ How long can I store the ice cream?
Transfer to an airtight container and keep frozen up to three days.
→ What flavors can I add?
Almost any—fruit purées, cocoa powder, espresso, or even a spoonful of jam work beautifully.
→ Do I need rock salt?
Coarse table salt works fine; the key is to lower the ice’s freezing point.
→ Is this safe for kids?
Absolutely, just supervise the shaking and keep the salty ice water away from their faces.
→ Can I make this dairy‑free?
Swap the cream and milk for coconut cream and almond milk; the process remains the same.
Chef's Tips
If the mixture is still soft after shaking, give it another minute or two.,Feel free to swirl in chocolate chips or fruit after the ice cream is set.,The bag can be reused for future batches—just wash and dry thoroughly.
Nutrition Facts
per serving
210
Calories
3g
Protein
20g
Carbs
14g
Fat
Taste Profile
Creamy, lightly sweet, with a whisper of vanilla
Ingredient Substitutions
Don't have an ingredient? Try these alternatives
Provides similar richness; may add a faint coconut flavor.
Adds depth; use slightly less as it is liquid.
Recipe Variations
Try these delicious twists on the original
Spicy Version
Add a pinch of cayenne pepper and a drizzle of chocolate for a subtle kick.
Mediterranean Style
Mix in crumbled pistachios and a splash of rose water after freezing.
Common Mistakes to Avoid
Learn from others' mistakes for perfect results
- Overfilling the inner bag, which limits movement.
- Using warm ice, which slows the freezing process.
- Not shaking long enough, resulting in a watery texture.
Meal Prep & Storage
Make Ahead Tips
You can whisk the cream, milk, sugar, and vanilla together a day ahead and keep it chilled; just add to the bag when ready to freeze.
Leftover Ideas
Re‑scoop into a fresh bag and give it a quick shake to bring back softness before serving.
Perfect Pairings
Serve this with...
Cooking Timeline
Gather and measure all ingredients; combine cream, milk, sugar, and vanilla.
Seal the mixture in the quart‑size bag and prepare the ice‑salt mixture.
Shake the bag vigorously until the mixture thickens.
Remove the inner bag, wipe, and serve immediately.
5‑Minute Ice Cream in a Bag – Quick Frozen Treat
A sweet, silky scoop of homemade ice cream that comes together in just five minutes—no machine required, just a bag, ice, and a little love.
Timing
Prep Time
5 Minutes
Cook Time
5 Minutes
Total Time
10 Minutes
Recipe Details
Ingredients
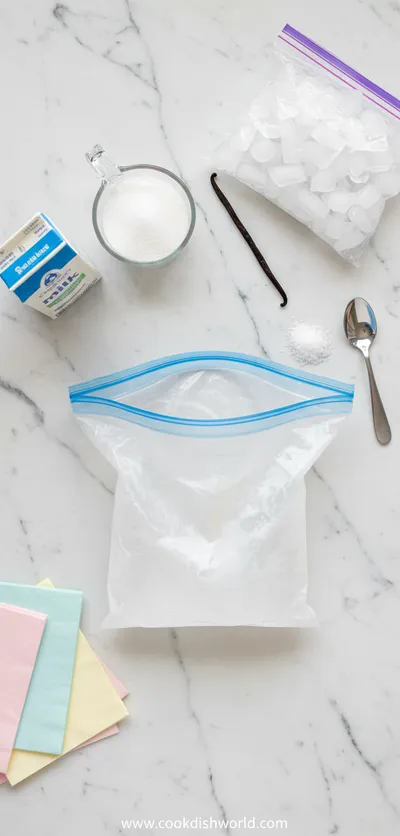
Base
- 01 1 cup heavy cream
- 02 1/2 cup whole milk
- 03 1/4 cup granulated sugar
- 04 1 tsp vanilla extract
- 05 1 quart‑size zip‑top bag
Freezing Mixture
- 01 3 cups ice cubes
- 02 1/2 cup coarse salt
- 03 1 gallon‑size zip‑top bag
Instructions
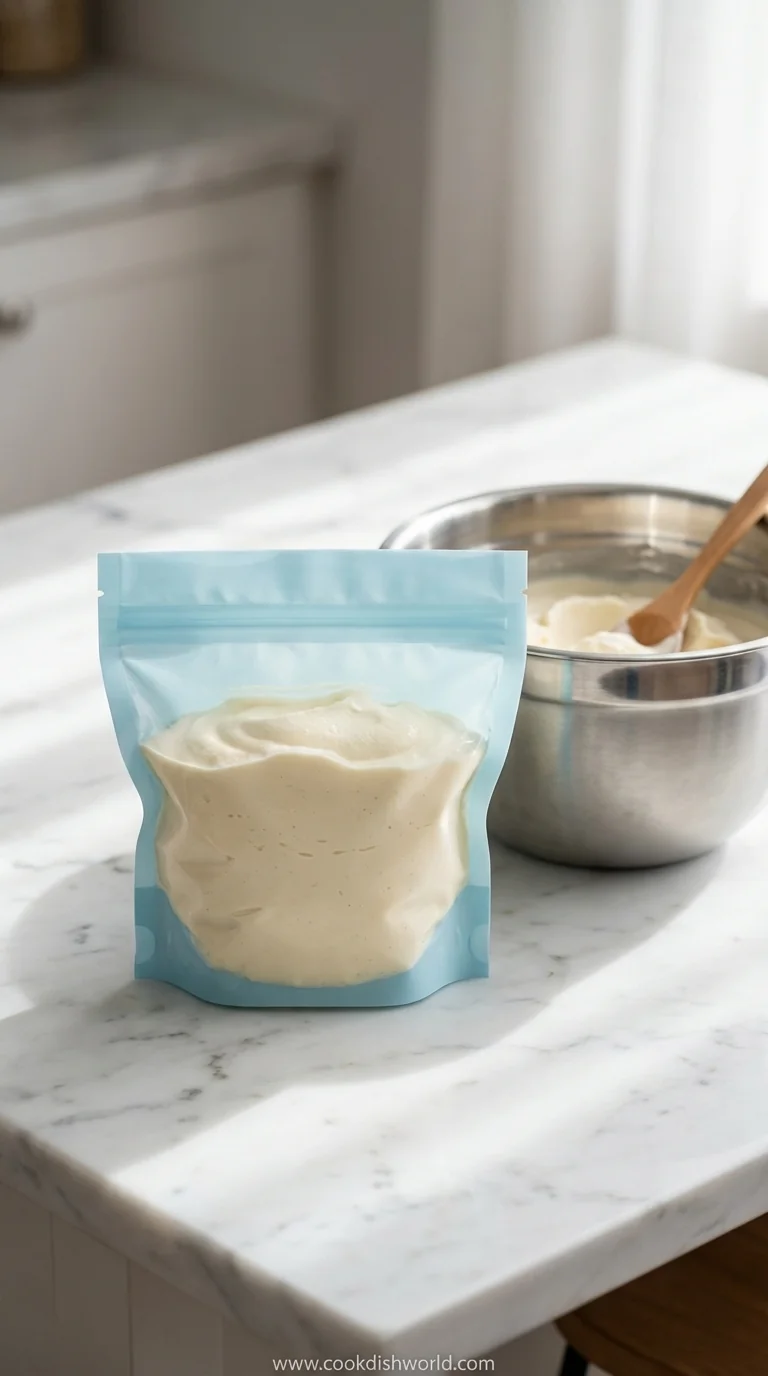
In the quart‑size bag, combine the cream, milk, sugar, and vanilla; seal tightly, removing as much air as possible.
Fill the gallon‑size bag halfway with ice cubes, then sprinkle the coarse salt over the ice.
Place the sealed cream bag inside the ice‑filled bag, then seal the outer bag securely.
Shake the bag vigorously for 5–7 minutes, feeling the bag become firmer as the mixture freezes.
Remove the inner bag, wipe away any salt, and scoop the ice cream into bowls or cones. For extra fun, try an ice cream sandwich.
Notes & Tips
- 1 If the mixture is still soft after shaking, give it another minute or two.
- 2 Feel free to swirl in chocolate chips or fruit after the ice cream is set.
- 3 The bag can be reused for future batches—just wash and dry thoroughly.
Tools You'll Need
-
Quart‑size zip‑top bag
-
Gallon‑size zip‑top bag
-
Measuring cups
-
Spoon for scooping
-
Kitchen towel for grip
Must-Know Tips
- Don’t overfill the inner bag; it needs room to move.
- Keep the outer bag level; too much ice can cause spills.
- Taste the ice cream before sealing to adjust sweetness.
Professional Secrets
- Use ice that’s as cold as possible for a quicker set.
- Adding a pinch of corn syrup can improve smoothness.
- Shake in short bursts to avoid fatigue and keep motion even.

Recipe by
AmeliaAmelia is a seasoned food blogger and recipe creator at CookDishWorld, where she blends culinary expertise with an unwavering love for sharing delicio ...
Get Delicious Recipes Weekly
Join 25,000+ home cooks getting our best recipes straight to their inbox.
Free forever • No spam • Unsubscribe anytime