Why You'll Love It
- - No oven needed, perfect for warm days
- - Layers of texture: silky pudding, airy cream, crisp chocolate
- - Quick assembly lets you enjoy more time with guests
- - Classic Boston flavor with a modern, light twist
*"The most effortlessly elegant dessert I've made—I could feel the soft sponge and rich chocolate in each bite.*"
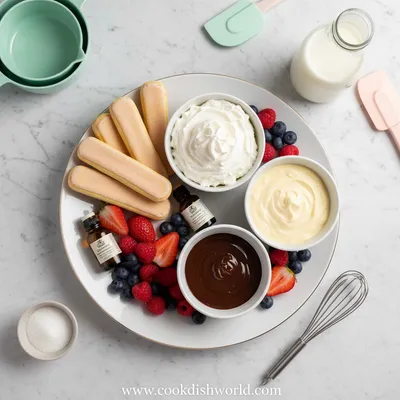
Essential Ingredient Guide
- Ladyfingers: Choose fresh, slightly sweet ladyfingers; they soften gently without becoming soggy.
- Vanilla pudding mix: Select a high‑quality mix for a rich, fragrant custard base.
- Chocolate ganache: Dark chocolate gives depth; melt slowly to keep it glossy.
- Whipped cream: Cold heavy cream whipped to soft peaks adds airy lift.
- Vanilla extract: A few drops intensify the custard’s warm scent.
- Powdered sugar: Sweetens the ganache subtly; adjust to taste.
Complete Cooking Process
-
Ingredient Readiness:
Gather all components, measure pudding mix, and chill the cream before whipping.
-
Flavor Development:
Whisk vanilla extract into the pudding as it cooks, then fold in whipped cream for a mellow profile.
-
Texture Control:
Layer ladyfingers quickly to prevent them from soaking too much, then add a thin ganache veil.
-
Finishing Touches:
Drizzle remaining ganache over the top, dust with cocoa or toasted nuts for visual contrast.
-
Serving Timing:
Refrigerate at least two hours; the cake sets and flavors meld beautifully.
- Keep whipped cream cold; it holds peaks longer.
- Use parchment between layers for easy removal.
- Spread ganache thinly to avoid soggy edges.
- Garnish with a sprinkle of toasted almond slivers for crunch.
Pro Tips
When the cake sits in the fridge, the layers gently knit together, creating a cohesive bite. I often find that a brief pause before slicing lets the chocolate set just enough to sparkle when the fork glides through. It’s a quiet moment—watching the glossy sheen break and the soft interior reveal itself. The calm of that pause mirrors the simple joy of sharing a dessert that feels both familiar and fresh.
The essence of the dish:
A fun fact or historical angle:
Flavor or sensory focus:
You Must Know
- Use chilled whipping cream for stability
- Layer quickly to keep cookies from turning mushy
- Allow the cake to set fully for clean slices
Frequently Asked Questions
→ Can I use gluten‑free ladyfingers?
Yes, substitute with a gluten‑free sponge or use gluten‑free ladyfingers; the texture will stay similar.
→ How long can I store the cake?
Keep it refrigerated in an airtight container for up to three days; the flavors may deepen.
→ Can I add fresh fruit?
Fresh berries add a bright contrast; scatter them between layers or on top just before serving.
→ What if I prefer darker chocolate?
Swap the dark chocolate for bittersweet or semi‑sweet—just remember to adjust the sugar in the ganache.
→ Do I need to bake the pudding?
No, use an instant‑mix pudding that thickens on the stove, then chill before folding.
→ Is it possible to make this vegan?
Yes, use plant‑based cream and a dairy‑free chocolate ganache, and replace ladyfingers with a vegan sponge.
Chef's Tips
The ladyfingers should stay just moist enough to soften without becoming mushy.,If the pudding seems too thick, whisk in a splash of cold milk before folding with the cream.,Ganache can be warmed slightly if it hardens too quickly; a gentle stir restores its shine.
Nutrition Facts
per serving
320
Calories
5g
Protein
32g
Carbs
18g
Fat
Taste Profile
A balanced sweet‑chocolate flavor with creamy vanilla undertones.
Ingredient Substitutions
Don't have an ingredient? Try these alternatives
Slice thinly; adjust soaking time so it stays tender.
Provides a sweeter, caffeine‑free alternative; reduce sugar accordingly.
Recipe Variations
Try these delicious twists on the original
Spicy Version
Add a pinch of cayenne and a drizzle of chocolate chili sauce for a subtle kick.
Mediterranean Style
Incorporate orange zest into the custard and garnish with toasted pistachios.
Common Mistakes to Avoid
Learn from others' mistakes for perfect results
- Letting ladyfingers sit too long before adding custard – they become mushy.
- Over‑whipping the cream – it turns grainy and loses fluffiness.
- Using too much ganache – it can overwhelm the delicate custard.
Meal Prep & Storage
Make Ahead Tips
You can prepare the custard and whip the cream a day ahead; keep them separately refrigerated, then assemble right before chilling.
Leftover Ideas
Reheat gently in the microwave for 10 seconds if you prefer a warm dessert, or enjoy chilled straight from the fridge.
Perfect Pairings
Serve this with...
Cooking Timeline
Gather all ingredients, measure pudding mix and milk, chill cream.
Cook vanilla pudding on stovetop, then cool.
Whip heavy cream with powdered sugar until soft peaks.
Fold pudding into whipped cream, prepare ganache.
Layer ladyfingers and custard, pour ganache, refrigerate.
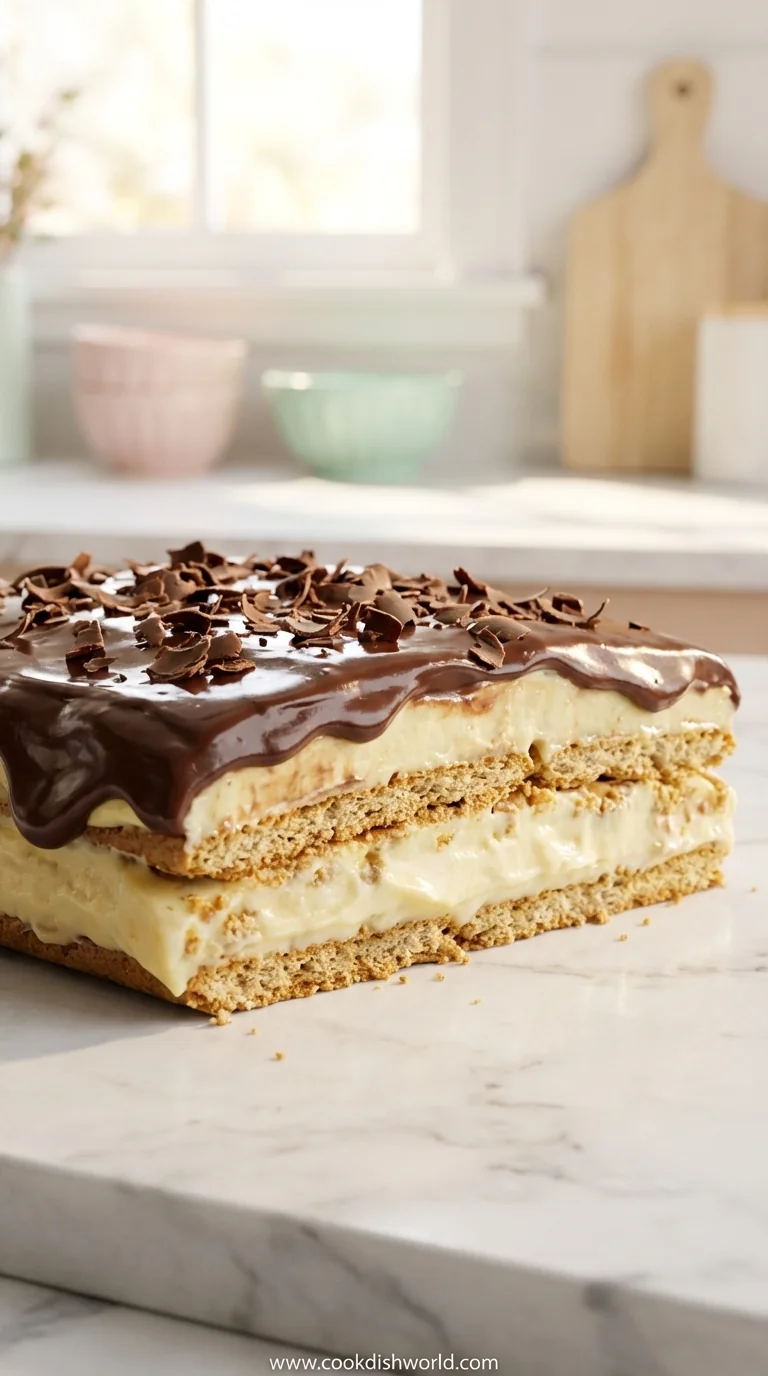
Boston Cream Icebox Cake – Easy No-Bake Dessert
Indulge in a light, creamy Boston Cream Icebox Cake that's ready in minutes—no baking required. A gentle blend of vanilla pudding, chocolate ganache and fluffy whipped cream, all layered between soft ladyfingers.
Timing
Prep Time
20 Minutes
Cook Time
10 Minutes
Total Time
30 Minutes
Recipe Details
Ingredients
Main Ingredients
- 01 1 package (about 7 oz) ladyfingers
- 02 2 cups vanilla instant pudding mix
- 03 2 1/2 cups cold milk
- 04 1 cup heavy whipping cream, very cold
- 05 2 tbsp powdered sugar
- 06 1 tsp vanilla extract
- 07 8 oz dark chocolate, finely chopped
- 08 1/4 cup heavy cream (for ganache)
Instructions
In a saucepan, whisk the vanilla pudding mix with 2 1/2 cups cold milk; cook over medium heat, stirring constantly, until thickened. Remove from heat, stir in vanilla extract, and let cool completely.
While the pudding cools, whip the cold heavy cream with powdered sugar until soft peaks form; set aside.
Fold the cooled pudding into the whipped cream gently, creating a smooth, airy custard.
Arrange a single layer of ladyfingers in a shallow dish, breaking them to fit if needed.
Spread half of the custard over the ladyfingers, then repeat with another layer of ladyfingers and the remaining custard. Smooth the top.
For the ganache, heat 1/4 cup heavy cream until just simmering; pour over chopped dark chocolate, let sit 1 minute, then stir until silky.
Pour a thin veil of ganache over the top layer, letting it drip down the sides.
Refrigerate the assembled cake for at least two hours, or until fully set.
Before serving, drizzle any remaining ganache and, if desired, dust with cocoa powder or garnish with toasted almond slivers.
Notes & Tips
- 1 The ladyfingers should stay just moist enough to soften without becoming mushy.
- 2 If the pudding seems too thick, whisk in a splash of cold milk before folding with the cream.
- 3 Ganache can be warmed slightly if it hardens too quickly; a gentle stir restores its shine.
Tools You'll Need
-
Saucepan
-
Whisk
-
Mixing bowls
-
Hand mixer or stand mixer
-
Spatula
-
Shallow serving dish
Must-Know Tips
- Keep all dairy chilled before mixing; it helps maintain structure.
- Work quickly when layering ladyfingers to control moisture.
- Use a silicone spatula to fold custard without deflating the cream.
Professional Secrets
- Room temperature pudding mixes blend smoother with cold cream.
- A thin ganache layer prevents soggy edges while providing glossy finish.
- Resting the cake overnight deepens the Boston cream flavor.

Recipe by
AmeliaAmelia is a seasoned food blogger and recipe creator at CookDishWorld, where she blends culinary expertise with an unwavering love for sharing delicio ...
Get Delicious Recipes Weekly
Join 25,000+ home cooks getting our best recipes straight to their inbox.
Free forever • No spam • Unsubscribe anytime