Why You'll Love It
- - Simple, no‑fuss dough that stays tender
- - Savory beef filling that’s quick to season
- - Perfect for both casual lunches and party appetizers
- - Makes a lovely freezer‑friendly batch
*"These empanadas are my new weekend go‑to—crispy, flavorful, and unbelievably easy!"*
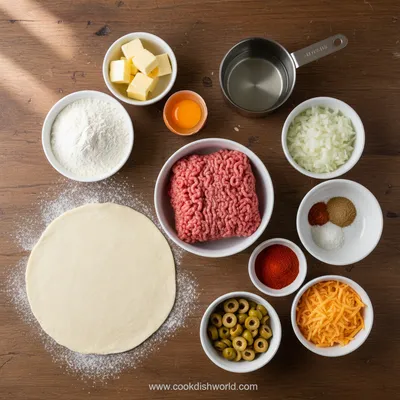
Essential Ingredient Guide
- Beef chuck: Choose a well‑marbled cut; it stays juicy and adds richness
- All‑purpose flour: Sifted for a light, flaky crust
- Cold butter: Keeps the dough tender and gives that buttery bite
- Paprika and cumin: Warm spices that deepen the beef’s flavor
- Lime juice: A splash brightens the filling just before sealing
- Honey: A tiny drizzle balances the savory notes
Complete Cooking Process
-
Ingredient Readiness:
Dice the beef, whisk the flour, and chill the butter so the dough stays cool.
-
Flavor Development:
Sauté onions, garlic, and spices until fragrant, then brown the beef.
-
Texture Control:
Roll the dough thin, but not paper‑thin, to keep a tender bite.
-
Finishing Touches:
Brush each empanada with egg wash, then sprinkle a pinch of sesame.
-
Serving Timing:
Serve warm, straight from the oven, while the crust is still crisp.
- Keep dough cold; work quickly to prevent gluten over‑development
- Don’t over‑fill; a little space prevents bursting
- Use a fork to crimp edges for a neat seal
- Bake on parchment for easy cleanup
Pro Tips
Well, those little adjustments make a world of difference. I’ve watched the same dough turn gummy when it warms too much, so my kitchen timer is always set to remind me to chill the dough for five minutes between batches. Ugh, it’s a tiny pause, but the payoff is a beautifully layered puff.
The essence of the dish:
A fun fact or historical angle:
Flavor or sensory focus:
You Must Know
- Cold butter is the secret to flakiness
- Don’t skip the resting time
- Seal edges tightly to avoid leaks
Frequently Asked Questions
→ Can I freeze the dough?
Yes, wrap the rolled dough tightly in plastic and freeze for up to a month. Thaw before shaping.
→ What if I don’t have beef chuck?
Ground beef works fine; just add a splash of beef broth for extra moisture.
→ How long do they keep refrigerated?
Stored in an airtight container, they stay fresh for 3‑4 days, reheated in a hot pan.
→ Can I bake instead of fry?
Absolutely, bake at 400°F (200°C) for 20‑25 minutes until golden brown.
→ What side pairs well?
A simple green salad with a citrus vinaigrette balances the richness.
→ Is the recipe gluten‑free?
Swap all‑purpose flour for a gluten‑free blend; the texture remains delightful.
Chef's Tips
If the dough feels sticky, dust with a little extra flour.,For extra crispness, brush with a mix of melted butter and egg.,Feel free to add peas or diced carrots for added texture.
Nutrition Facts
per serving
380
Calories
22g
Protein
32g
Carbs
18g
Fat
Taste Profile
Savory with a hint of sweet warmth
Ingredient Substitutions
Don't have an ingredient? Try these alternatives
Adjust cooking time; ground meat cooks faster.
Will give a nuttier flavor and slightly denser crust.
Recipe Variations
Try these delicious twists on the original
Spicy Version
Add ½ tsp chili powder and a dash of hot sauce to the filling for a gentle kick.
Mediterranean Style
Mix in chopped olives, feta crumbles, and sun‑dried tomatoes for a briny twist.
Common Mistakes to Avoid
Learn from others' mistakes for perfect results
- Overworking the dough, which makes it tough
- Filling the empanadas too full, causing leaks
- Baking at too low temperature, resulting in soggy crust
Meal Prep & Storage
Make Ahead Tips
You can prepare the dough a day ahead, wrap tightly and refrigerate; the filling can also be cooked and stored for 24 hours.
Leftover Ideas
Reheat gently in a skillet with a splash of oil to restore crispness.
Perfect Pairings
Serve this with...
Cooking Timeline
Prepare dough: mix flour, butter, water; chill.
Cook beef filling with aromatics and spices.
Roll dough, cut circles, fill, fold, and seal.
Brush with egg wash, bake until golden, then cool slightly.
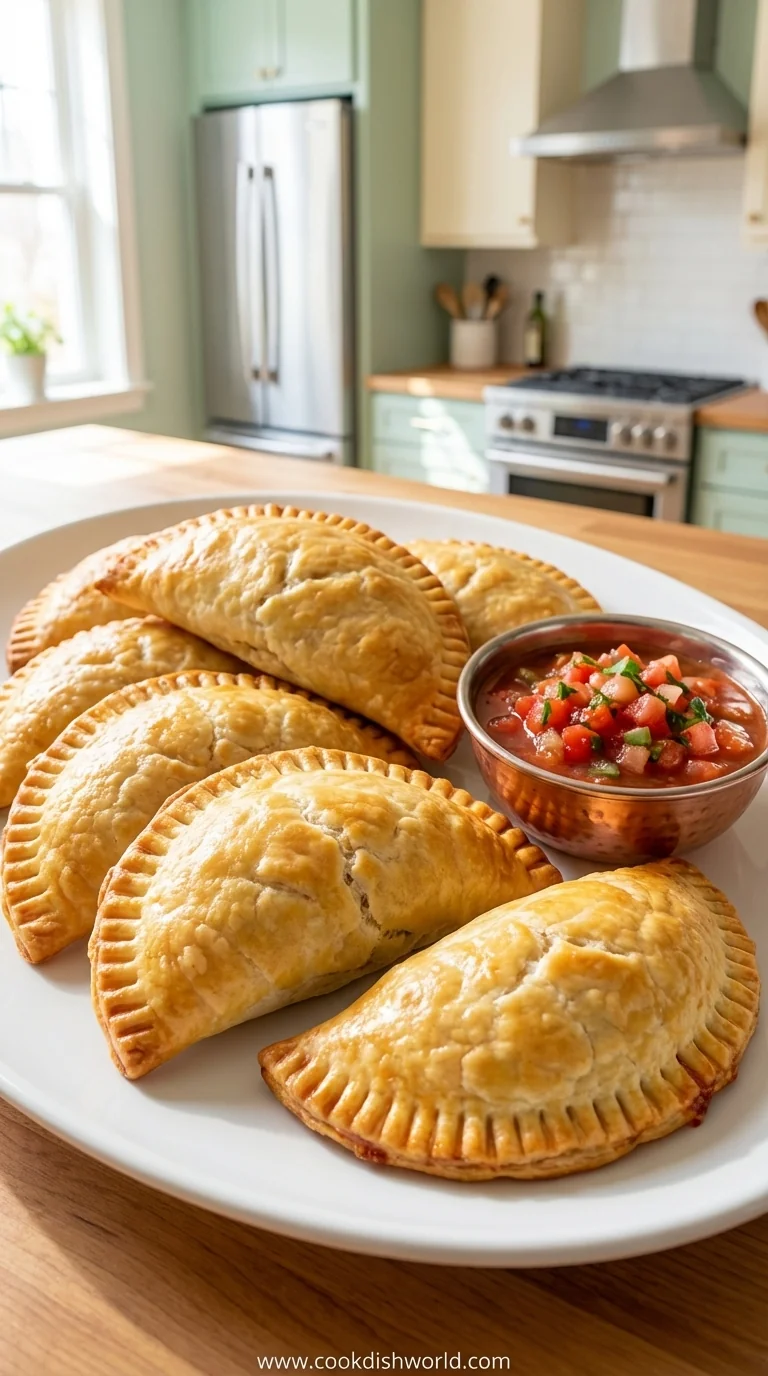
Easy Beef Empanadas
Discover how to make easy beef empanadas with a flaky crust and savory filling—perfect for quick meals any day. The dough is buttery, the beef is seasoned, and the result is comfort on a plate.
Timing
Prep Time
20 Minutes
Cook Time
25 Minutes
Total Time
45 Minutes
Recipe Details
Ingredients
Dough
- 01 2 ½ cups all‑purpose flour
- 02 ½ tsp salt
- 03 ½ cup cold unsalted butter, cubed
- 04 ⅓ cup ice‑cold water
- 05 1 egg, beaten (for egg wash)
Filling
- 01 1 lb beef chuck, finely diced
- 02 1 medium onion, minced
- 03 2 cloves garlic, crushed
- 04 1 tsp smoked paprika
- 05 ½ tsp ground cumin
- 06 ¼ cup beef broth
- 07 2 tsp lime juice
- 08 ½ tsp honey
- 09 Salt and pepper to taste
Instructions
In a bowl, whisk flour and salt, then cut in the cold butter until the mixture resembles coarse crumbs.
Add ice water gradually, stirring until the dough just comes together; form a disk, wrap, and chill for 15 minutes.
Meanwhile, heat a skillet over medium heat, add a drizzle of oil, and sauté onion and garlic until translucent.
Add the diced beef, paprika, and cumin; brown the meat, then pour in broth, lime juice, and honey. Simmer until liquid reduces, season, and set aside to cool.
Roll out the chilled dough on a lightly floured surface to about ¼‑inch thickness; cut circles using a 4‑inch cutter.
Place a spoonful of filling onto each circle, fold over, and crimp edges with a fork.
Brush each empanada with beaten egg, arrange on a parchment sheet, and bake at 400°F (200°C) for 20‑25 minutes until golden.
Notes & Tips
- 1 If the dough feels sticky, dust with a little extra flour.
- 2 For extra crispness, brush with a mix of melted butter and egg.
- 3 Feel free to add peas or diced carrots for added texture.
Tools You'll Need
-
Rolling pin
-
9‑inch biscuit cutter
-
Skillet
-
Baking sheet
-
Pastry brush
Must-Know Tips
- Don't overcrowd the pan, cook in batches for even browning
- Let the dough rest, ensures a tender crumb
- Taste the filling, adjust salt before sealing
Professional Secrets
- Use ice‑cold butter, creates steam pockets for flakiness
- Sear the beef quickly, locks in juices
- Egg wash adds shine and helps seal the edges

Recipe by
AmeliaAmelia is a seasoned food blogger and recipe creator at CookDishWorld, where she blends culinary expertise with an unwavering love for sharing delicio ...
Get Delicious Recipes Weekly
Join 25,000+ home cooks getting our best recipes straight to their inbox.
Free forever • No spam • Unsubscribe anytime