Why You'll Love It
- - Perfectly flaky crust that melts in your mouth
- - Sweet apple filling with a whisper of cinnamon
- - Handy size for parties or quick snacks
- - Easy to freeze and re‑heat for later cravings
*“These mini pies are pure nostalgia—every bite reminds me of my grandma’s kitchen.”*
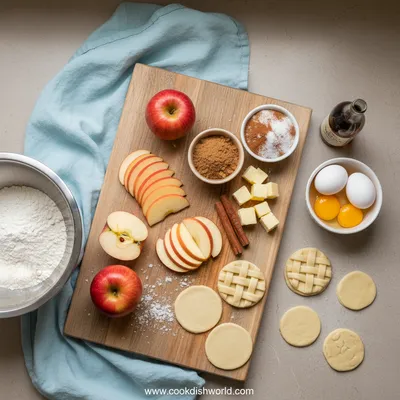
Essential Ingredient Guide
- Apples: Choose firm, slightly tart apples like Granny Smith; they hold shape and add brightness.
- Butter: Cold butter creates those delicate layers in the crust.
- Brown Sugar: Adds depth and a caramel‑like sweetness to the filling.
- Cinnamon: A pinch enhances the apple's natural flavor without overwhelming.
- Lemon Juice: A splash balances the sweetness and prevents browning.
- Egg Wash: Gives the tops a golden shine and a slight crisp.
Complete Cooking Process
-
Ingredient Readiness:
Core and dice the apples, toss them with sugar, cinnamon, and lemon juice, then set the butter chilled for the dough.
-
Flavor Development:
Cook the apple mixture gently until it just begins to soften, allowing the sugars to caramelize lightly.
-
Texture Control:
Roll the dough thin, cut circles, and press gently to form a tender yet sturdy shell.
-
Finishing Touches:
Brush each mini pie with egg wash, sprinkle a tiny pinch of sugar, and bake to golden perfection.
-
Serving Timing:
Serve warm, straight from the oven, or let cool to room temperature for a snackable treat.
- Keep all butter and water ice‑cold for flakiness
- Don’t over‑mix the dough; it should just come together
- Freeze assembled pies before baking for a crispier crust
- Use a small cookie cutter for uniform size
Pro Tips
Well, these little tricks helped me perfect the crust after many attempts. I find that a brief chill of the assembled pies before baking really locks in that buttery melt‑in‑your‑mouth texture. Also, a quick dusting of coarse sugar just before they go into the oven adds a subtle crunch that surprises the palate.
The essence of the dish:
A fun fact or historical angle:
Flavor or sensory focus:
You Must Know
- Work with cold ingredients
- Don’t over‑fill the shells
- Watch the edges for a perfect golden edge
Frequently Asked Questions
→ Can I use a different fruit?
Absolutely, try pears or a mix of apples and berries for a seasonal variation.
→ How do I prevent soggy bottoms?
Blind bake the crust for a few minutes before adding the apple filling, and keep the filling a bit thick.
→ Can I make these ahead of time?
Yes, assemble the pies, freeze them, and bake whenever you’re ready; add a few extra minutes to the bake time.
→ What size pan works best?
A standard 12‑cup muffin tin yields uniform mini pies.
→ Do I need a special cutter?
A small round cookie cutter (about 2‑inch) works fine; a tartlet pan is also great.
→ How can I make the crust gluten‑free?
Swap all‑purpose flour for a gluten‑free blend and add a tablespoon of xanthan gum.
Chef's Tips
If the crust starts to brown too quickly, loosely tent the pies with foil.,A touch of nutmeg adds extra warmth; use sparingly.,For a glossy finish, brush with a second light coat of egg wash halfway through baking.
Nutrition Facts
per serving
150
Calories
2g
Protein
20g
Carbs
7g
Fat
Taste Profile
Warm, sweet, and comforting with a hint of spice
Ingredient Substitutions
Don't have an ingredient? Try these alternatives
Will give a nuttier flavor; may need a touch more water.
Works but may reduce flakiness slightly.
Recipe Variations
Try these delicious twists on the original
Spicy Version
Add 1/4 tsp ground ginger and a pinch of cayenne for a gentle kick.
Mediterranean Style
Mix in chopped dried apricots and a drizzle of honey before baking.
Common Mistakes to Avoid
Learn from others' mistakes for perfect results
- Over‑mixing the dough, which makes the crust tough.
- Filling the pies too heavily, causing overflow.
- Baking at too low a temperature, leading to soggy bottoms.
Meal Prep & Storage
Make Ahead Tips
You can assemble the pies and freeze them uncovered for up to 24 hours before baking. Brush with egg wash just before they go into the oven.
Leftover Ideas
Reheat gently in a skillet over low heat, covering with a lid to keep the crust tender.
Perfect Pairings
Serve this with...
Cooking Timeline
Prepare dough: combine flour, salt, butter, and ice water; chill.
Dice apples and toss with sugars, cinnamon, lemon, and cornstarch.
Roll dough, cut circles, fill tins, and brush with egg wash.
Bake until golden, then cool slightly before removing.
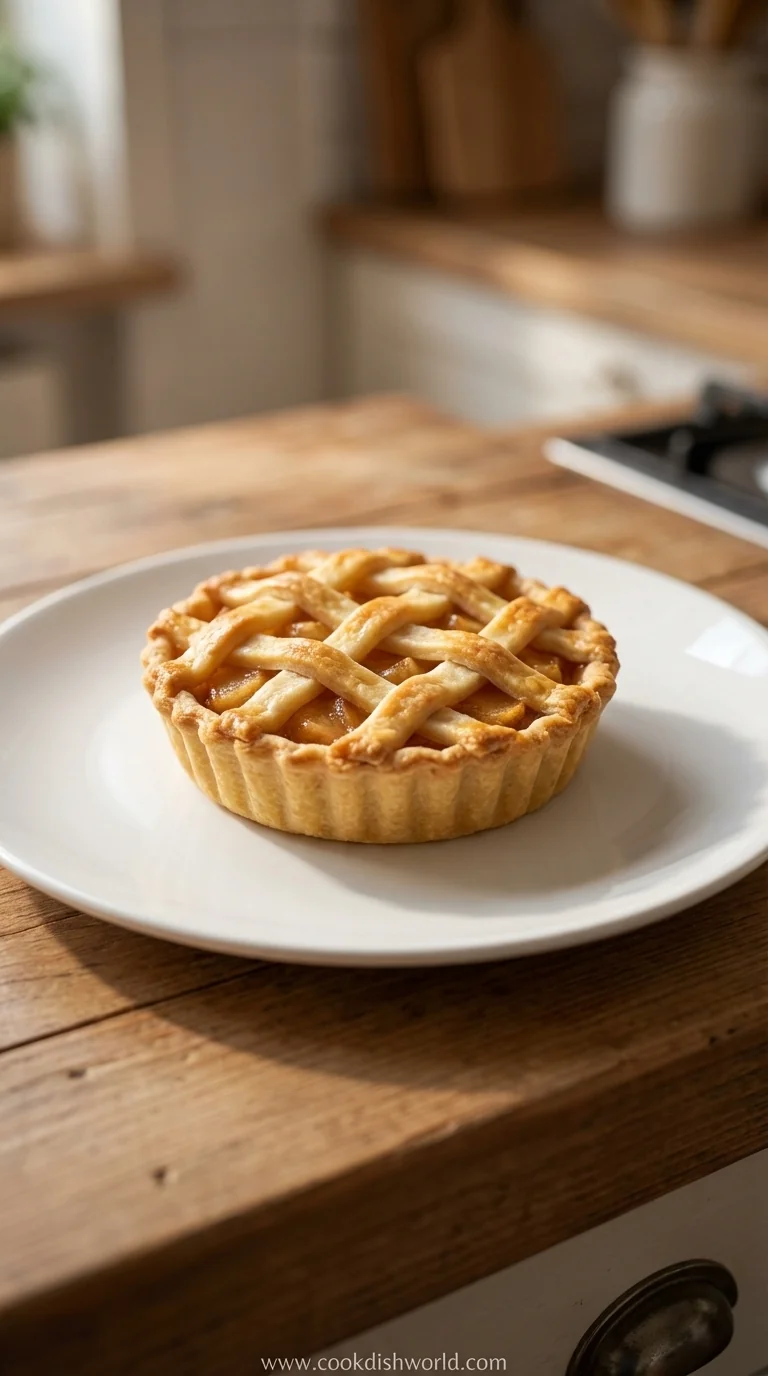
Mini Apple Pies
Enjoy bite-sized Mini Apple Pies with a flaky crust and sweet apple filling—perfect for a quick dessert or snack. These little wonders bring the comfort of a classic apple pie into a handheld treat that feels warm and familiar.
Timing
Prep Time
20 Minutes
Cook Time
25 Minutes
Total Time
45 Minutes
Recipe Details
Ingredients
Crust
- 01 2 cups all‑purpose flour
- 02 1/2 tsp salt
- 03 1 cup cold unsalted butter, cubed
- 04 1/4 cup ice water
Filling
- 01 4 medium apples, peeled and diced
- 02 1/4 cup brown sugar
- 03 2 tbsp white sugar
- 04 1 tsp ground cinnamon
- 05 1 tbsp lemon juice
- 06 1 tbsp cornstarch
Finishing
- 01 1 egg, lightly beaten (egg wash)
- 02 1 tbsp granulated sugar (optional for sprinkling)
Instructions
In a bowl, whisk together flour and salt. Add the cold butter and, using your fingertips, rub it into the flour until the mixture resembles coarse crumbs.
Drizzle ice water over the crumb mixture, stirring gently until the dough just comes together. Form into a disk, wrap in plastic, and chill for at least 30 minutes.
While the dough chills, toss diced apples with both sugars, cinnamon, lemon juice, and cornstarch. Set aside to macerate.
Preheat oven to 375°F (190°C). Roll the chilled dough on a lightly floured surface to about 1/8‑inch thickness.
Cut circles using a 2‑inch cutter, press each into the wells of a muffin tin, and fill each shell with a spoonful of apple mixture.
Brush the exposed edges with egg wash and sprinkle a pinch of sugar if desired.
Bake for 20‑25 minutes, or until the crust is golden and the apples are bubbly.
Allow to cool in the tin for 5 minutes, then remove gently. Serve warm or at room temperature.
Notes & Tips
- 1 If the crust starts to brown too quickly, loosely tent the pies with foil.
- 2 A touch of nutmeg adds extra warmth; use sparingly.
- 3 For a glossy finish, brush with a second light coat of egg wash halfway through baking.
Tools You'll Need
-
Mixing bowl
-
Pastry cutter or fork
-
Rolling pin
-
Muffin tin
-
Small cookie cutter
-
Baking sheet
Must-Know Tips
- Don't over‑mix the dough – it stays tender
- Keep butter cold for flaky layers
- Watch the edges for that perfect golden hue
Professional Secrets
- Chill the dough and butter separately for optimal lamination
- Use a hot oven to create steam, aiding flakiness
- Brush with egg wash for an inviting sheen

Recipe by
AmeliaAmelia is a seasoned food blogger and recipe creator at CookDishWorld, where she blends culinary expertise with an unwavering love for sharing delicio ...
Get Delicious Recipes Weekly
Join 25,000+ home cooks getting our best recipes straight to their inbox.
Free forever • No spam • Unsubscribe anytime